Tutorial
What the magical pen does
With the magical pen, you draw freehand curves that connect to each other to outline a tile (called a Conway tile) that will fill the plane with its copies. The tiling can have colored tiles (you choose the colors), or just show outlines of the tiles. The outlines can be colored or not, thick or thin. You can download a copy of the tiling in PNG or SVG format.
To begin
Click on the Start Drawing button. There are five types of tiles that are illustrated; click on one of these and follow the directions.
Drawing S-curves
The magical pen automatically creates an S-curve when you start and draw to the white X that appears. While you draw half of the S-curve, the other half is drawn magically, and the two halves meet at the X. When your pen draws a curve in one direction, the magical pen draws the same curve backwards, moving in the opposite direction.

Drawing parallel curves
When you choose to create a tile with two parallel edges, the magical pen will automatically draw a parallel copy of the first curve you draw. When you have drawn your first curve, you can move its position by placing your cursor on the curve (not an endpoint) and dragging. The curve will slide (not rotate); it will remain parallel to the second curve.

Undo one step
At any time when you are creating a tile, you can undo the last step by clicking this button. You can undo several steps, all the way to the beginning.
Warning: the Undo button erases a step permanently.
No crossing edges
Edges of a single tile cannot cross. When you draw a curve that crosses an edge, a red X will appear there. You can trace back over the curve to erase part of it, or click the Undo button and draw a new curve that doesn't cross an edge.
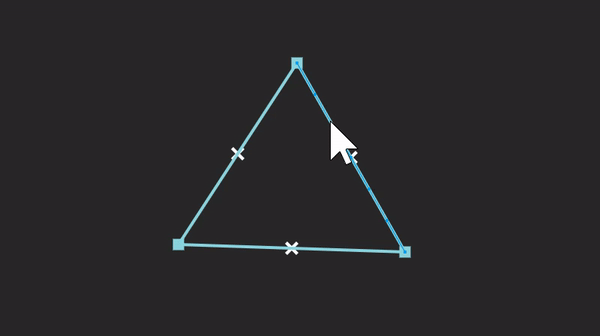
“Safe” starting regions
You create each of the edges that connect to each other to outline a Conway tile. When there is a choice of where to start an edge, you will see a shaded region in which it is “safe” to begin drawing the curve. It is possible to start outside the shaded region, but then it is more likely you will intersect another edge.
Highlighted endpoints
When the endpoint of a curve is highlighted, you must begin the next curve there. This ensures that edges connect properly to outline the tile.
Modifying the tile curves
When your tile is complete, you can modify its edges. Place your cursor on one of tile's edges and drag to modify the curve's shape. You can make more than one adjustment to the tile outline. Once your tile has the desired changes, click on the Show Tiling button to produce its tiling.
Endpoints of tile edges (the small squares) and center points of S-tiles (where the white Xes are) cannot be moved.
Grooming the tiling

When viewing the tiling, you can change its appearance.
Tiles in your tiling can have 0, 2, 3, 4, 6, or 7 colors. To choose the number of colors for the tiles, click on the “Tile colors” drop-down box. “Tile outlines only” will show just the tile outlines in a tiling that is like a coloring book page. To choose colors for the tiles, click on each colored square at the right to change its color. To change the size of a tile or its tiling, use the Zoom slider. To choose the color of the tile outlines, click on the white square and choose a color. To change the thickness of the tile outline, use the Tile Outline slider.
To go back to edit the tile, click on the Edit Tile button.
Downloading images
You can download the image of a tiling by going to the Export menu, choosing PNG or SVG format in the drop-down box, then clicking on this Export icon.
Happy Accidents
You might draw an edge for a tile that crosses itself or crosses a different edge, creating a second tile that you prefer to keep. In this case, your tiling will show two tiles that together fill the plane.
Start over
At any time in drawing a tile and its tiling, you can start over. To create a new tile of the same type, click on the New button. To start a tile of a different type, click on the Home button and choose a different type.